Ultrasonic Cleaner Testing
Today, one of my clients reminded me that I had promised to write about ultrasonic cleaners and how they should be tested. So here goes:
Step 1: Degassing – What is “degassing” and why is it important?
Degassing is the process of removing small suspended gas bubbles and dissolved gas from a liquid prior to using it as a vehicle for ultrasonic cleaning. Dissolved gas, if not removed, migrates into cavitation bubbles during their formation and prevents them from imploding violently to promote the cleaning effect and gas bubbles absorb ultrasonic energy reducing the sound intensity in the tank. The gas acts to cushion the imploding bubble much like an air bag in a car. Liquids should be degassed by raising the temperature, adding the cleaning chemistry and operating the ultrasonic energy for a period of time ranging from 10 to 30 minutes (depending on the size of the tank and the nature and concentration of the chemicals being used) minimum prior to use. Small bubbles will not be seen rising to the liquid surface during ultrasonic operation in a completely degassed liquid.
Step 2: Aluminum foil testing
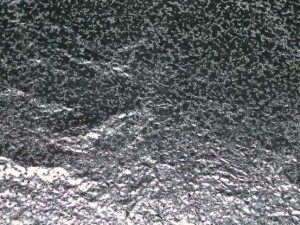
The most reliable measurement device for cavitation is a simple foil test. To perform the test, a piece of aluminum foil is placed vertically in the cleaning bath down to the bottom of the tank spanning opposite corners. Typical immersion time for the foil is 1 min in the bath. Upon inspection of the foil, a pattern of indentations, and possibly holes (depending on the foil thickness, frequency and power density) should occur. In a properly designed ultrasonic tank, the pattern on the foil should be uniform and cover the entire area. This shows that even cavitation is occurring, and, therefore, cleaning sh
ould be even and consistent. If the pattern is inconsistent and there are dead zones, then inconsistent cleaning can occur.
How do I perform the “glass slide” test?
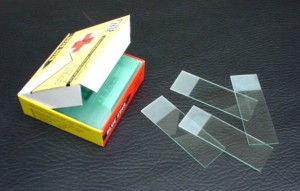
Wet the frosted portion of a glass slide with tap water and draw an “X” with a No. 2 pencil from corner to corner of the frosted area. Making sure that the tank is filled to the fill line, immerse the frosted end of the slide into fresh cleaning solution. Turn on the ultrasonics. The lead “X” will begin to be removed almost immediately, and all lead should be removed within ten seconds.
How do I perform the “foil” test?
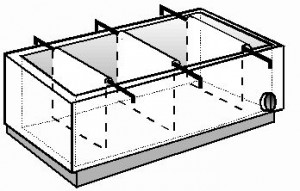
Cut three small pieces of aluminum foil about 4″ x 8″ each. Fold each piece over a rod that you will use to suspend the foil in the tank. A clothes hanger works well. Your cleaner should be filled with an ultrasonic cleaning solution, degassed, and brought up to normal operating temperature. Suspend the first “square” in the center of the tank and the other two a couple of inches from each end of the tank. Make sure that the tank is filled to the fill line, and turn on the ultrasonics for about ten minutes. Remove the foil and inspect: All three pieces of aluminum foil should be perforated and wrinkled to about the same degree.